Welcome!

Hi, a big thank you for visiting me today. I love to be creative in my free time. I have started this blog to share my creations with you.

A great variety of hobbies take my fancy, I love papercrafing, knitting, crocheting, baking, photography and making lovely gifts from the heart.

Please, feel free to leave a comment on things that catch your eye. I have at this point chosen to moderate comments. As I do not wish to have any spam comments posted to my blog. So, for all the genuine visitors your comments are warmly appreciated.

WELCOME! Kick off your shoes, grab a cuppa and have a browse around. I hope you enjoy what I have to share with you. Please, come and visit often, 'cause ya never know what ya gunna get!!!

Thanks for popping by and happy creating!
Cheers, Deb

Monday, November 9, 2009

MONSTER Patty Cakes.......


G'day, How are you going?  I hope you are having a wonderful day.  It's Monday AGAIN?!!  Where is the time going?  Chrissie will be here before we know it.  I have drawn up some sketches of the cards I want to make for Chrsitmas, so hopefully I can share some of my ideas here with you soon. 
Today I have some photos of the Monster patty cakes we made the day our nephew spent the day at our house.  I will include the recipe along the way as well.


Here they are all snug in their paper cases waiting to go in the oven.  The recipe is a basic banana cake one that I have been using for years.  I divided it into three bowls and added some blue, green and red colouring to each.  We put a drop of each colour mix into each paper  case. 


And here they are fresh from the oven.  Ghoulish, yaaaahhh....


Here is a closeup of the inside.  ''Monster Patty Cakes''.  Some Mums will try anything to get fruit into their kids.  This is one of the best recipes for doing that.  I used bananas in the base recipe, I also peeled and diced a pear.  Sneaky, Me?!  No!  I'm just a Mum doing her job.  Lol. 
Now, here is the Recipe:-
BANANA CAKE
150g margarine or soft butter
1 cup brown sugar
2 eggs
1 cup mashed, very ripe bananas
1 3/4 cups self-raising flour
1 teaspoon cinnamon

METHOD
1)  Preheat oven to 180 degrees celsius.
2)  Place papers in Patty pans.
3)  Beat margarine or butter and brown sugar together until creamy.
4)  Add eggs one at a time, beating well between each addition.
5)  Beat in mashed banana.  Don't be concerned if mixture appears to curdle.
6)  Sift flour and cinnamon together and mix into banana mixture.  If you are adding food colouring or extra fruit do so now.
7)  Spoon into patty papers and bake for between 15-20 mins.  Or until cooked when tested with a skewer.

I hope you give this recipe a whirl, it is so easy.  It works well as a whole cake as well.  Just cook it in any pan, until a skewer inserted in the center comes out clean.  I didn't get a chance to ice or frost these ones as they just evaporated.  You can use a plain vanilla frosting if you like.  It is up to you, the cake is a nice moist one, fine without any extra topping.
Well that's it from me today.  I will be back soon with some more cards and things to share.  I have two birthday cards to do and the Christmas cards to start.  So, I should have some more papercrafting ideas in my next post.
Thanks for popping by and happy creating.
Cheers, Deb

Tuesday, November 3, 2009

A New Blog AND Some Blog Candy.....

G'day, A quick post to let you know about a new blog and some blog candy.  Andrea from Andrea's Stampin Moments has set up a new blog called Annabelle Stamps Blog.  You can check it out by clicking this link.  While you are there enter for your chance to win the candy.  THREE newly released Christmas stamp sets and FIVE lots of newly released Sprinkles.  WOW!!!!!  Amazingly generous!  Thanks Andrea!  Get moving, over you go, the chance to enter the blog candy is opened until the 22nd of November.  Good Luck! 

Thanks for popping by and happy creating.
Cheers, Deb

Wednesday, October 28, 2009

Baby It's Magic!!!!!

G'day, Firstly let me appologize, I haven't been here for a while, so sorry for that.  I have been uber busy getting ready to leave town for a few days.  We went to Melbourne for a friends wedding.  Four days away without the boys.  It was great and hard at the same time.  First time we have left them for that long! 

Onto todays share, this is a card I made for our niece and her partner.  The idea is from Splitcoast, it's called a Magic Card.  You can find the tutorial by clicking here.  Check out my card and if you get a kick out of it go check out the tutorial.

I just love this image I think she is so cute.  All sweet and innocent throwing her bowl over the edge. Lol


Here comes the magic.  As you pull on the slider at the top the image colours in!  How adorable is that?


I just love this style of card.  I had fun working on this one.  It was quiet involved but I love a challenge.


Posted by Picasa
I have used this verse before in baby cards, I just love it.  I think it's because, it can be used for either a boy or girl baby.  And there's just a smidgen of truth in it!  Lol

Okay, that is it for me today.  I hope you have enjoyed my card and are inspired to go check out the tutorial.  

Thanks for popping by and happy creating.
Cheers, Deb   


Friday, October 16, 2009

Stacks On!!!!!

G'day, Hope you are having a lovely day.  Today I'm sharing a card I made to partake in a challenge by a blog called Pile It On.  Their theory is to make a card, scrapbooking or off the page project using more than one current challenge.  To see how many challenges you can use on one creation.  Wow! I'm excited!

Here is my card for this weeks challenge.  This is my list of challenges and their links.

Pile it on - Use Aly's Sunday Challenge
Aly's Sunday Challenge  - Use sketch
Color Chef - Use black, white, orange and bright pink
Cupcakes Craft Challenges - Use buttons and stitching
Caardvarks - Use ribbon in a wonderful way
Flutter By Wednesday - Use a butterfly or fairy
Crazy 4 Challenges - Use a Thankful sentiment

Wow! That's seven challenges, I think I have surprised myself.


In this side view you can see abit more of the ribbon detail.  I made the ribbon yo-yo by layering the two ribbons together and then stitching it.  Glued the Mother of Pearl button in the middle.  With the buttons at the top, I threaded the ribbon through the holes and then twisted it to form the tails.

 
This is a close up of the pretty fairy.  She is an image from Andrea's online stamp store she can be found here.  The original image is of a girl laying in a cluster of flowers, for this challenge  I turned her into a fairy. 

I stamped her and coloured her in only using orange, pink and a milky white copics.  I cut her out, then added a pair of fairy wings, cut out of coloured vellum.  I then layered her onto a piece of white cardstock that I had sponged the edge of with pink.  I added some bling by putting kidyglitz on her wings and flower centers.

Hope you have enjoyed my share today.  Why not check out some of the challenges and find some inspiration.

Thanks for popping by and happy creating.
Cheers, Deb


Wednesday, October 14, 2009

What Is This?????


G'day, How has your day been today?  Wonderful I hope.  If you answered ladybird to my question then you're right.  Now, I don't know if ladybirds represent anything but I seem to be seeing them everywhere, thinking of them, creating them and generally being surrounded by them lately. 

This watery version was created by my tea cup.  I had placed it on the table and when I lifted it up to have a drink this is what I discovered.  I quickly grabbed the camera and started shooting away.  Crazy?  Maybe!  I just seem to be receiving alot of ladybird signals lately.  I thought she was cute enough to share with you. 

Just a quick post today, be back soon with some more creations to share.

Thanks for popping by and happy creating!
Cheers, Deb


Friday, October 9, 2009

The Pink Pic-a-nic Basket.....

G'day Everyone,  I have finally found some time to do a post.  I think someone has hit the fast forward button.  I'm on the lookout for the culprit, so if you see someone running around with my remote pushing my fast forward button please let me know! Lol.

Onto todays share, the card I have for you is one I made to play along with Mothermark's Teapot Tuesday.  You can see her story here.  Mothermark is taking a break for a while.  And I'm very late with this card, but, I had already sketched out my idea and poem before my fast forward button had been hit (remember keep a lookout).  I finished the card and thought I may as well share it any wayz!  Onto the card and my poem......

The Pink Pic-a-nic Basket

There's a Teddy Bear in there,
Some giant pears as well,
There are wedges of watermelon,
And cheeky prawns in their shell.

There's Mississippi Mud Pie,
And fresh Honey in a pot,
There's Southern Fried Chicken,
Hmm, crispy and hot.

The Teddy is a cuddly friend for Barney Bear,
The food is for everyone to share.
A pic-a-nic tea party in Yellowstone Park.
Let's show this little bear some love and have a great lark!

A little bit about the card.....  I paper weaved the basket.  I cut the cardstock into strips, then inked the edges, cut out the basket shape and taped all the strips on, on an angle.  Then I weaved the strips on the other angle and taped the ends behind.  Cut and inked the top and handles and then taped it all together and put the brads on the handles.

I was going to make this card a never ending card, I found the idea for that here on Dawn's blog.  The problem with trying to do that, was the basket was too bulky, and I would have had to cut it in half.  So, instead of making the cardstock at the back two pieces I kept it as one and made it so the top and bottom can flip open to reveal the picnic.  See the side view above. 

Well, that's it from me today folks, hope you enjoyed my card.  And, PLEASE, if you see a person running a round with my remote let me know!

Thanks for popping by and happy creating!
Cheers, Deb 

P.S.  I forget to tell you, I'm now a GREAT Aunt, our niece gave birth to her beautiful baby girl Wednesday night.  Bubby is absolutey gorgeous!  Mum and bub are doing well!  So is Dad.


Saturday, September 26, 2009

Want Some Candy?????

G'day everyone, Just a quick post this morning to let you know of some blog candy over at Andrea's Stampin Moments.  On the last friday of every month Andrea has Freebie Fridays.  This weekend you can win some of her amazing Sprinkles, all you have to do is leave a comment.  So, get moving, click here and enter for your chance to win.  Good Luck!!!

Thanks for popping by and happy creating,
Cheers, Deb 

Friday, September 25, 2009

A Poem.....

G'day everyone, Sorry I haven't been here for a while, I've been spring cleaning.  Yah!  I am still working on some cards in between, but I don't have anything to share yet.  So, today I thought I would share a poem I wrote about 14 years ago.  I penned this after my Grandfather had passed. 

Pop

You had been sick for so long,
The doctors said your heart was strong.
The heart that loved everyone,
The heart that knew sorrow and fun.
The heart that we knew we could melt with a smile,
The heart that would give in, mile after mile.
The heart that would shelter and protect from the cold,
The heart that was loved by young and old.
Your heart carried you through many phases of life,
Work, children and a loving wife.
The heart that was made of the purest gold,
Made with a love that could not be bought or sold.
Now the time has come for us to say ''Goodbye''.
I tried so hard not to cry.
But, as the tears began to drop,
I thought of your loving heart coming to a stop.
Pop, I love you now and always,
And in my heart I will keep you until my last days.

Love Deb

Well, that's it for me today, hope you enjoyed my very first ever poem.  Let me know what you think, I love to read your comments.


I'll be back soon with some more crafty creations.


Thanks for popping by and happy creating.
Cheers, Deb


Sunday, September 20, 2009

A Hole In One.....

G'day everyone, Thanks for visiting today, hope you are having a lovely weekend.  The idea for todays card came from Dawn's blog and if you click here you will be able to see her tutorial video on how to make it.  I changed the size a little bit, I made it a little taller then Dawn's one.

This style of card is called a tri-fold or gatefold card.  I found the images on a  free pages colouring-in site.  Printed them out and coloured them in with regular felt tip pens (made this before I bought my copics).


This photo shows the card open, I placed the image on one side of the front panel and the sentiment on the other.  The message I wrote along the inside image reads ''We hope your day is 'Par-fect!'''  This also came from one of Dawn's cards, I think it may be a Stampin Up! sentiment.

Well, I hope you enjoyed your visit today.  Would love to hear your thoughts on my card. 

Thanks for popping by and happy creating.
Cheers, Deb


Friday, September 18, 2009

Baby Pocket Book (The Next Episode).....

G'day everyone, Happy Friday!  I hope you have had a terrific week.  Here are the baby pocket book pictures as promised.  You can find the link for Teresa's blog and her tutorial video in the post below this one.  Really worthwhile spending some time looking around her great blog. 

This is a close up of the flower embellishment I made up for the front.  I cut the little duck out of the animal designer paper I used inside.  Cute little ducky!

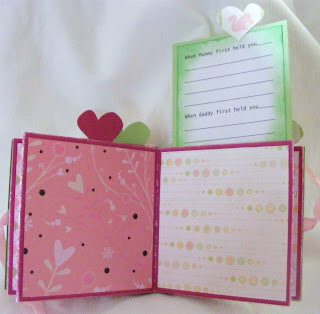
This photo shows the first two pages, and the tag in the first pocket.  On this tag I included a printout for bubs' birth details.(Just click on the photo to enlarge it) 

The third and forth pages, and the second tag.  I alternated the colour of the tags.  I used a heart shaped punch to cut out the little animals.  This tag is for Mum and Dad to record their first thoughts of bubby. 

The fifth and sixth pages, and third tag.  The animal tabs were glued to the top of the tags and then I trimmed the tag to the correct height to fit the pocket.  This tag can be used by Mum and Dad to record what they feel or think when they first cuddle bub. 

Here are the seventh and eighth pages, and the fourth and last tag.  I punched out more hearts in the co-ordinating colours to glue to the back of the tabs, to give a neat finish.  This tag can be used to record some fun birth memories, and how bub reacted to her new world.

Now, there are another two pages, but, I didn't photograph those did I!  So, that gives a total of ten pages for some adorable first photos and loads of room for some precious memories. 

This is a photo of the back cover.  I always sign my cards or creations with ''Handmade With Love By Deb'' and draw a little butterfly.  So, now you know where I came by my blog name.
A beautiful little keepsake, that can be used as a brag book for Mum and Dad. And a great memento for bubby when she is older.
That is my share for today. Leave me a comment, I would love to hear your opinion.  Hope you have a wonderful weekend.

Thanks for popping by and happy creating.
Cheers, Deb


Thursday, September 17, 2009

A quick one.....

G'day everyone, Hope you are all having a wonderful week.  Just a quick post today.  I'll share more photos of this cute little book tomorrow.  This is part of the present we gave to our niece and her partner, for their new baby.  Bub is due in October. (Cluck, cluck, cluck) lol


I found the idea for this little pocket book on Tresa's blog , check it out it has loads of inspiration.  You can see her great tutorial video here.


That's it for today!  See, told ya it was gunna be quick.  Back tomorrow with more on this cute little package.


Thanks for popping by and happy creating.
Cheers, Deb


Monday, September 14, 2009

Saving Lou-La Bella.....

G'day everyone, My share today is two cards I've made for Mothermark's Teapot Tuesday tea party.  If you don't know this weeks story head over to her blog, here first.  Then come back and share my story.
If you already know Mothermarks Lou-La Bella Story read on...
Lady Zahara Baba is on a mission, to help save a fellow ladybug,
From a kidnap drama by a very nasty yella thug.
Ladybug Lou-La Bella Rock-a-fella has been taken, snatched away,
Her Mother is hosting a tea party, in hopes of saving the day.
So, in her V.W. beetle convertible, swift and fast,
Zahara's zooming and vrooming to help squish him into the past.
For extra security and some muscles that are big and strong,
She has bought her cousin Bazza along.
Now, Bazza is a bouncer, he can lift heavy things, but, he ain't that bright.
He might just be the ticket, to give that yella fella a great big fright!
They'll partake of tea and bickies, 'til they are full and fat,
Then help save Lou-La Bella, by squashing that big, ugly, yella, thug, bug FLAT!
Hope you enjoyed my story and my cards. Let me know what you think.
Thanks for popping by and happy creating.
Cheers, Deb

Saturday, September 12, 2009

Thank you......

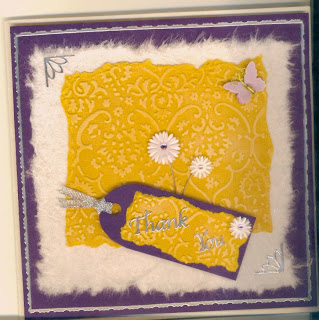
G'day everyone, Hope you are having a lovely weekend.  Sorry for the late post, we were out at a friends birthday.  I have a card to share with you today.  This card was made for my brother to give to one of his valued customers.
I love to use yellow and purple together.  All the flowers and the butterfly were 3D stickers from the same pack (think they were a set bought from a discount store).  I made the purple tag.  All the silver, except for the ribbon, are stickers as well.
I made the inside very basic, to leave lots of room for a thank you note to be included.  I love this verse  it reads, ''Alone  we can do so little, together we can do so much.'' by Helen Keller.

If we could all work together what an amazing world it would be!  I hope you enjoyed my share today, let me know what you think.  Back tomorrow with some more cards for this week's Mothermark tea party.


Thanks for popping by and happy creating.
Cheerio, Deb

Thursday, September 10, 2009

Sugar and spice........

G'day everyone, Hope you are all having a lovely week.  For my share today I have some sugar cookies that I made.  I found the recipe here, thanks to Jenny for sharing her amazing recipes with everyone. 
I made three different styles of the cookies, teddy bears, rabbits and rounds (with hearts and smiley faces).  They looked super cute and tasted very yummy (wish I could pass some through to you).
Here is one of my bunny rabbits.  If you click here you will see another video that shows how to bake the cookies.  You bake them for about 20 minutes at 180 degrees.
I will include here another video that shows you how to make royal icing.  I used pure icing sugar.  Once all the sugar was added and the consistency right, I added a teaspoon and a half of fresh lemon juice.  This is to cook the egg whites. 

You can find other Signature Sweet Shoppe videos on how to decorate the cookies on Youtube. 

I hope you have enjoyed my scrumdiddlyumous share today.
Thanks for popping by and happy creating.
Cheers, Deb

Tuesday, September 8, 2009

Introducing Lady Baba.....

G'day everyone, My second post for today.  I have made this card for the Teapot Tuesday Challenge over on Mothermark's blog.  Please, go check out the story here first and then come back and see my story. 
If you already know Mothermark's story then let me Introduce.....drum roll please......  Lady Zahara Baba....

Lady Baba is a fashionista from the Ladybird House of Couture.  She has been following Zeke's wild and wilful ways and studying his style.  Zahara has fallen under his influence.  And has decided spots are soooo yesterday.  Now, she will only sport her beautiful stripes.  This highflying trendsetter is about to set the Ladybird world on fire! 


This is a photo of her good side.  It shows her lovely sparkly stripes up close and personal.  And how they bring out the blue of her eyes.  *giggling*

Thanks Mothermark loved your challenge and all the great stories and cards. 

Hope you enjoyed my take on Mothermark's challenge.  I had so much fun drawing and then paper piecing Lady Baba.  Let me know what you think, I love reading all the comments.

Thanks for popping by and happy creating.
Cheers, Deb

Monday, September 7, 2009

Blue and Green Should Never Be Seen....

G'day everyone, Hope you all had an amazing weekend.  And all the Dad's had a wonderful day yesterday.  The card I am sharing with you today is one I made for our nephew, he turned 13 this year, Wow.  Where does the time go?!! 
I started by colouring this cute little House Mouse image (not sure of his name).  Once I had chosen the cardstock and paper for this card it came together really quickly.  I stamped the blue background cardstock and then layered everything together.  The light blue you see around the outside is actually the insert.  I left it to overhang and then I tore it.     
Do you know the old saying ''Blue and green should never be seen, without a colour in between''?  Well, I think they go well together.  I like the way the pop off each other.  What do you think?
Here is the inside, more stamped background and a little layering.  You can see the torn insert better as well.  Looks abit like a little mouse has been busy nibbling.
That's it for today folks.  I have a couple of projects that I'm hoping to get finished over the next couple of days, so be sure to come back soon.
Thanks for popping by and happy creating.
Cheers, Deb

Saturday, September 5, 2009

Hhhmmmm, Chocolate, aaawwhhh.....

G'day everyone, Firstly, let me warn you.  This post contains CHOCOLATE.  If you need to, look away now!  Only kidding, it's only visible in one of the photos, and, it's in it's wrapping.  So, we should be all okay. Giggling.
Today, I'm sharing my version of an idea I found on Dawn's blog, it is called a candy bar slider.  If you click here you will be able to view her tutorial video.  She has the best videos.
I had to rework the measurements to fit the cadbury chocolate in well.  I think it looks 'sweet'.  Rolling on the floor laughing. (rotfl)
Here is the chocky pulled out.  You just pull the ribbon bow at the top and out it comes and then push it back in.  Too, cute!    
Here is a close up of the tag.  Lots of sparkles.  I used a polysparkle embossing powder on the stamped flowers.  Then I inked the centres of the flowers with yellow and stamped the sentiment.  I then added kindyglitz to the 'Just'.  So glittery in real life.
Well folks, that's it for me today.  Hope you laughed along with me and enjoyed my post.
Thanks for popping by and happy creating.
Laugh and the world laughs with you.  Snore and you sleep alone!
Cheers, Deb

Friday, September 4, 2009

Babies, babies, babies everywhere......


G'day everyone, Friends of ours have just added to their family with a new little baby boy.  He is just sooo cute.  Little sweetie.  I am so clucky.  Lol.  

Today I have chosen to share the nappy cake I made as their gift.  A little less colour then the last one, still, it was very cute.  And it was loved by both Mum and Dad. 
I love the way the baby blanket around the outside looks so much like fondant icing.
Here it is all wrapped up in cello and with the ingredients tag.
The main reason for sharing this cake today was because, I actually remembered to take a photo of the tag.  Yah!!!  The crowd goes wild! 

I did this up on the computer (idea came from the ingredients lists you find on everything these days).  I punched out the hearts, inked the edges of the tag and hearts.  I glued two of the hearts onto the paper and then laminated it.  Then I added the heart on the bottom.

Hope you have enjoyed my share today.  I would love to hear what you think.  Hope you have a lovely weekend.


Thanks for popping by and happy creating.
Love doesn't make the world go round.  It's what makes the ride worthwhile.
Cheers, Deb

Thursday, September 3, 2009

There's a Mouse in the House.....

G'day everyone, Hope you are having a lovely week.  Today, I'm sharing a card I made for our niece's birthday.   
This cute little image is from House Mouse, I'm not sure of the name.  I received him as a part of a 'random act of kindness' and the lady didn't include the names of the images.  Never to mind, he is just so sweet!
He is the first image I coloured with my copics markers.  I like to sponge around an image, I think it helps to make them 'pop' a little.
The base cardstocks are both embossed with a cuttlebug.  The 'Happy Birthday' piece is core'dinations cardstock.  I lightly sanded it to show the pink core.  The pink piece I rubbed a pink ink pad over to hightlight the raised areas of the embossing.  Then I added some bling.  Every girl has gotta have some bling! 
Here is the inside.  I always like to do a little something on the inside of my cards to finish them off.
Hope you have enjoyed what I have to share today.  Please, feel free to leave me a comment.  I would love to hear what you think of this or any of my creations.
Thanks for popping by and happy creating.
Have a wonderful day!
Cheers, Deb

Wednesday, September 2, 2009

Ripping, inking and rolling......

G'day everyone.  Today I'm sharing the present that I made for my sister in-law's 40th birthday.  So, a big thanks to Cindy, for allowing me to share her photos.  Cindy loves to scrapbook all her children's photos, so, I thought we would give her an album for herself.  The purpose of the album is for her to scrap the photos from her party.  I also included, a collection of photos of her life.  Sort of a ''This is Your Life'' style idea.  Confused yet?  Keep looking, I think it will become clearer. 
I have taken alot of photos to try and show how the layout works.  I have done two post to be able to share them all with you, so just scroll down to the next post to see them all.     
This the first page.  I was trying to make this look like an old fashioned bodice.  I ripped then rolled the centre of the pages then layered them.  Added the eyelets and ribbon.  Then I inked all the edges with a brown and caramel ink. 
I carried the bodice idea through to the next two pages.
This is a close up of the first page.  More ripping, inking and rolling.
Close up of the second page.  Ripping, inking, rolling......
Scroll down for the other photos.