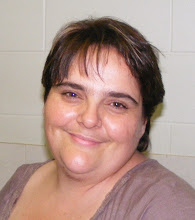
Welcome!

Hi, a big thank you for visiting me today. I love to be creative in my free time. I have started this blog to share my creations with you.

A great variety of hobbies take my fancy, I love papercrafing, knitting, crocheting, baking, photography and making lovely gifts from the heart.

Please, feel free to leave a comment on things that catch your eye. I have at this point chosen to moderate comments. As I do not wish to have any spam comments posted to my blog. So, for all the genuine visitors your comments are warmly appreciated.

WELCOME! Kick off your shoes, grab a cuppa and have a browse around. I hope you enjoy what I have to share with you. Please, come and visit often, 'cause ya never know what ya gunna get!!!

Thanks for popping by and happy creating!
Cheers, Deb

Friday, February 19, 2010

A 21st Surprise.....

G'day, Hope you are having a great Friday.  The days are going by very fast again.  At the moment, I am working on a scrapbook, for my nephew, with Mum .  We have been busy sorting through photos, and I've been sketching out some layouts.  I will be taking photo's and posting about it all once he has received it.

For today's post, I have the card I made for our neice's 21st Birthday.  It is another idea from Splitcoast, called a Free Standing Pop-Up Card.  If you click on the link it will take you to the tutorial, a photo one and a video one!

Here it is all folded flat.


This photo shows the card standing up.  The centre pulls up and the outside forms the base.

Here is a side view to show you how it stands on it's own.

As usual, I added extra.  I just can't help myself.  We gave our neice a gift card, and so I added a flap and closure on the back.  This shows it closed.

In the above photo the flap and closure are open, and we can see the gift card holder.  It was a great little surprise!

This style of card is quite easy to make.  I found by adding the extra on the back of the main panel, it also added weight.  This extra weight had me fiddling around abit.  The top wanted to fall over, but, I was able to add some little tabs that tucked into the base.  Ta, Da, Free Standing Pop-Up Card. 

I hope you have enjoyed my card and ramblings today.  Pop over to Splitcoast, they have some great inspiration over there.  If you find something you would like to share with me just leave a comment so I can check it out. 

Thanks for popping by and happy creating.
Cheers, Deb

P.S.  I have a surprise brewing, so stay tuned and check back again soon!  Ta-Ta for now!

Friday, February 5, 2010

I'm Back......................

     G'day, Yes, I am still alive and kickin'.  All I can say is, wow!  How busy is the end of the old year and the start of the new?!  There is of course, Christmas in December, which also has three birthdays for us.  Then our youngest's birthday is mid January, and, in the same week as his, we have two more birthdays and, then another before the end of the month. 

     And I, being my very organised self (cough, cough), always leave everything to the last minute.  It is not that I forget anyone or anything, it is that I just I am not organised enough to do things ahead of time.  But, that is all changing over the course of this year.  Small little baby steps towards a clutter free, organised lifestyle. 

     Okay, enough of my rambling, onto my share for today.  This is a card I made for my Aunt to celebrate her anniversary.  It has been 9 years since she has been reunited with us.  And she is a very lovely lady and I just wanted to her to know how wonderful it has been getting to know her.  She was adopted, and as a only child, she felt very happy finding out about her three half brothers and her half sister.  And an endless supply of neices and nephews.  We are HER family.

     Rambling again, sorry for that.  The card is made from a paper napkin/serviette.  I sort of changed up the Felted Cardstock Tutorial that I found over at Splitcoast. 
 
     I separated off the top layer, the bit with the design.  And instead of using an iron, I spread glossy accents in a thin layer  onto some white cardstock.  Then, I very carefully, laid this onto the cardstock and, again, very gently, smoothed over for any air bubbles.  Left it to dry and then cut out around the design.  You could also use double side Jac paper to get this type of finish.
 
     I wanted to keep this panel the focus of the card, so, just used a few small embellishments to accent the main picture.

     Hope you enjoyed your visit today, please visit Splitcoast.  They have some wonderful ideas in their resources section.  All the techinques have photo tutorials and some even have video ones.  Wow! I love Splitcoast Stampers!  So, if you are in need of some inspiration to get those creative juices flowing, just click on their pink name above, and go check them out.

Thanks for popping by and happy creating.
Cheers, Deb